
Are you tired of juggling numbers and struggling to keep your finances organized? Imagine having your very own accounting software, tailored just for your needs, right inside Excel.
Creating an accounting tool in Excel might sound complicated, but it’s easier than you think—and it can save you time, reduce errors, and give you full control over your finances. You’ll learn simple, step-by-step methods to build an effective accounting system that fits your business or personal needs perfectly.
Ready to take charge of your accounts and simplify your financial management? Let’s dive in!
Credit: quickbooks.intuit.com
Planning Your Accounting Software
Planning your accounting software is the first step to success. It sets a clear path for building a tool that works well. Good planning saves time and avoids mistakes later. Start by understanding what the software must do and who will use it.
This phase helps keep the project focused. It guides choices on design and functions. Without planning, the software can become confusing and hard to use. Clear goals make the process smooth and effective.
Identifying Key Features
List the main tasks the software should handle. Common features include tracking income and expenses. It should generate reports like profit and loss statements. Consider adding invoice creation and payment tracking. Think about data backup and security needs. Make a simple list of these important features.
Focus on features that meet daily accounting needs. Avoid adding too many complex functions at first. Keep the software easy and practical. This approach helps users feel comfortable and confident.
Setting Up User Requirements
Understand who will use the software. Are they beginners or have some accounting knowledge? Note their skill levels to match the software’s difficulty. Ask what devices they will use, like computers or tablets. Check if multiple users need access at the same time.
Gather user preferences on interface design and language. Simple menus and clear labels improve usability. Plan for training or help sections if needed. Tailoring the software to user needs makes it more useful and accepted.
Designing The Excel Layout
Designing the Excel layout is the first step in building accounting software. A clear layout helps users find and enter data quickly. It also reduces errors and improves workflow. Planning your layout carefully saves time later. You create a base that supports all accounting tasks effectively.
Structuring Worksheets
Start by organizing your Excel file into multiple worksheets. Each sheet should have a clear purpose. For example, one sheet for transactions, another for accounts, and one for reports. Keep data separate but linked. This method keeps your file clean and easy to navigate. Use simple names for each worksheet. Avoid clutter by limiting the number of columns and rows. Group related data close together. Use headers to label each column clearly. This helps users understand the data at a glance.
Creating Data Entry Forms
Data entry forms simplify input and reduce mistakes. Design a form on a separate worksheet or use Excel’s built-in form feature. Place fields logically, following the natural flow of data entry. Use drop-down menus for options like account types or categories. This limits errors and speeds up input. Add clear labels and instructions near each field. Use borders or shading to separate form sections. Make the form user-friendly and visually neat. Test the form by entering sample data to ensure it works well.
Building The Chart Of Accounts
Building the chart of accounts is a key step in creating accounting software in Excel. It acts as the backbone of your financial system. The chart organizes all financial transactions into clear groups. This makes tracking money easier and reporting more accurate.
Start by listing all types of accounts your business needs. These accounts cover assets, liabilities, income, and expenses. A well-structured chart helps you see where money comes from and where it goes.
Categorizing Accounts
Divide accounts into main categories like assets, liabilities, equity, income, and expenses. Each category holds related accounts. For example, assets include cash, equipment, and inventory. Expenses cover rent, utilities, and salaries.
This grouping keeps data neat and easy to find. It helps when making financial statements or checking balances. Use clear names that describe each account’s purpose. This avoids confusion later.
Setting Account Codes
Assign a unique code to each account in the chart. Codes are usually numbers that show the account type and order. For example, assets might start with 1, liabilities with 2, and so on.
Keep codes simple and consistent. Use a system that allows adding new accounts without mixing numbers. Account codes make sorting and searching faster in Excel. They also help in creating formulas for reports.
Implementing Data Validation
Implementing data validation in your Excel accounting software helps keep your data clean and accurate. It controls what users enter into cells. This reduces errors and saves time on fixing mistakes later. Proper validation also makes your software easier to use.
Data validation ensures that only the right type of data goes into each cell. This is especially important in accounting, where wrong numbers can cause big problems. Use Excel’s built-in tools to set rules for data entry. These rules guide users and prevent wrong inputs.
Restricting Input Types
Restricting input types means allowing only certain kinds of data in a cell. For example, you can allow only numbers in a cell for amounts. Or restrict dates to a specific range, like the current year.
To do this, select the cells you want to control. Go to the Data tab and click on Data Validation. Choose the type of data allowed, like whole numbers or dates. Set limits if needed. This stops users from typing letters where numbers belong.
This helps keep your accounting records accurate. It also prevents accidental mistakes that can cause errors in calculations.
Using Drop-down Lists
Drop-down lists let users pick from a list of options. This makes data entry faster and more consistent. For example, you can create a list of expense categories like “Rent,” “Utilities,” and “Salaries.”
Create the list on a separate sheet or in unused cells. Then select the target cells, go to Data Validation, and choose List. Enter the range with your list items. Users will see a small arrow and can select the correct option easily.
This method reduces spelling errors and ensures uniform data. It also speeds up entering repetitive information in your accounting software.
Automating Calculations
Automating calculations in Excel saves time and reduces errors. It helps manage your accounting data quickly. You can focus on analyzing numbers instead of doing manual math.
Excel formulas do the math for you. They update totals as you add or change data. This makes your accounting software more efficient and reliable.
Setting Up Formulas
Start by entering basic formulas for addition, subtraction, multiplication, and division. Use cell references instead of fixed numbers. This way, your calculations update automatically.
For example, to sum expenses, use the =SUM() function. Type =SUM(B2:B10) to add values from cells B2 to B10. This formula changes when you add new rows inside this range.
Use simple formulas for calculating taxes or discounts. Keep formulas consistent across rows and columns. This helps avoid mistakes and makes the sheet easier to understand.
Creating Summary Tables
Summary tables show totals and key figures in one place. They give a quick overview of your financial data. Use formulas like =SUM() or =AVERAGE() to calculate totals or averages.
Organize summary tables by categories such as income, expenses, and profit. Use Excel’s PivotTable feature for dynamic summaries. PivotTables update automatically when your data changes.
Keep summary tables clear and simple. This helps track your business performance at a glance. Make sure the tables update as you enter new data.

Credit: www.youtube.com
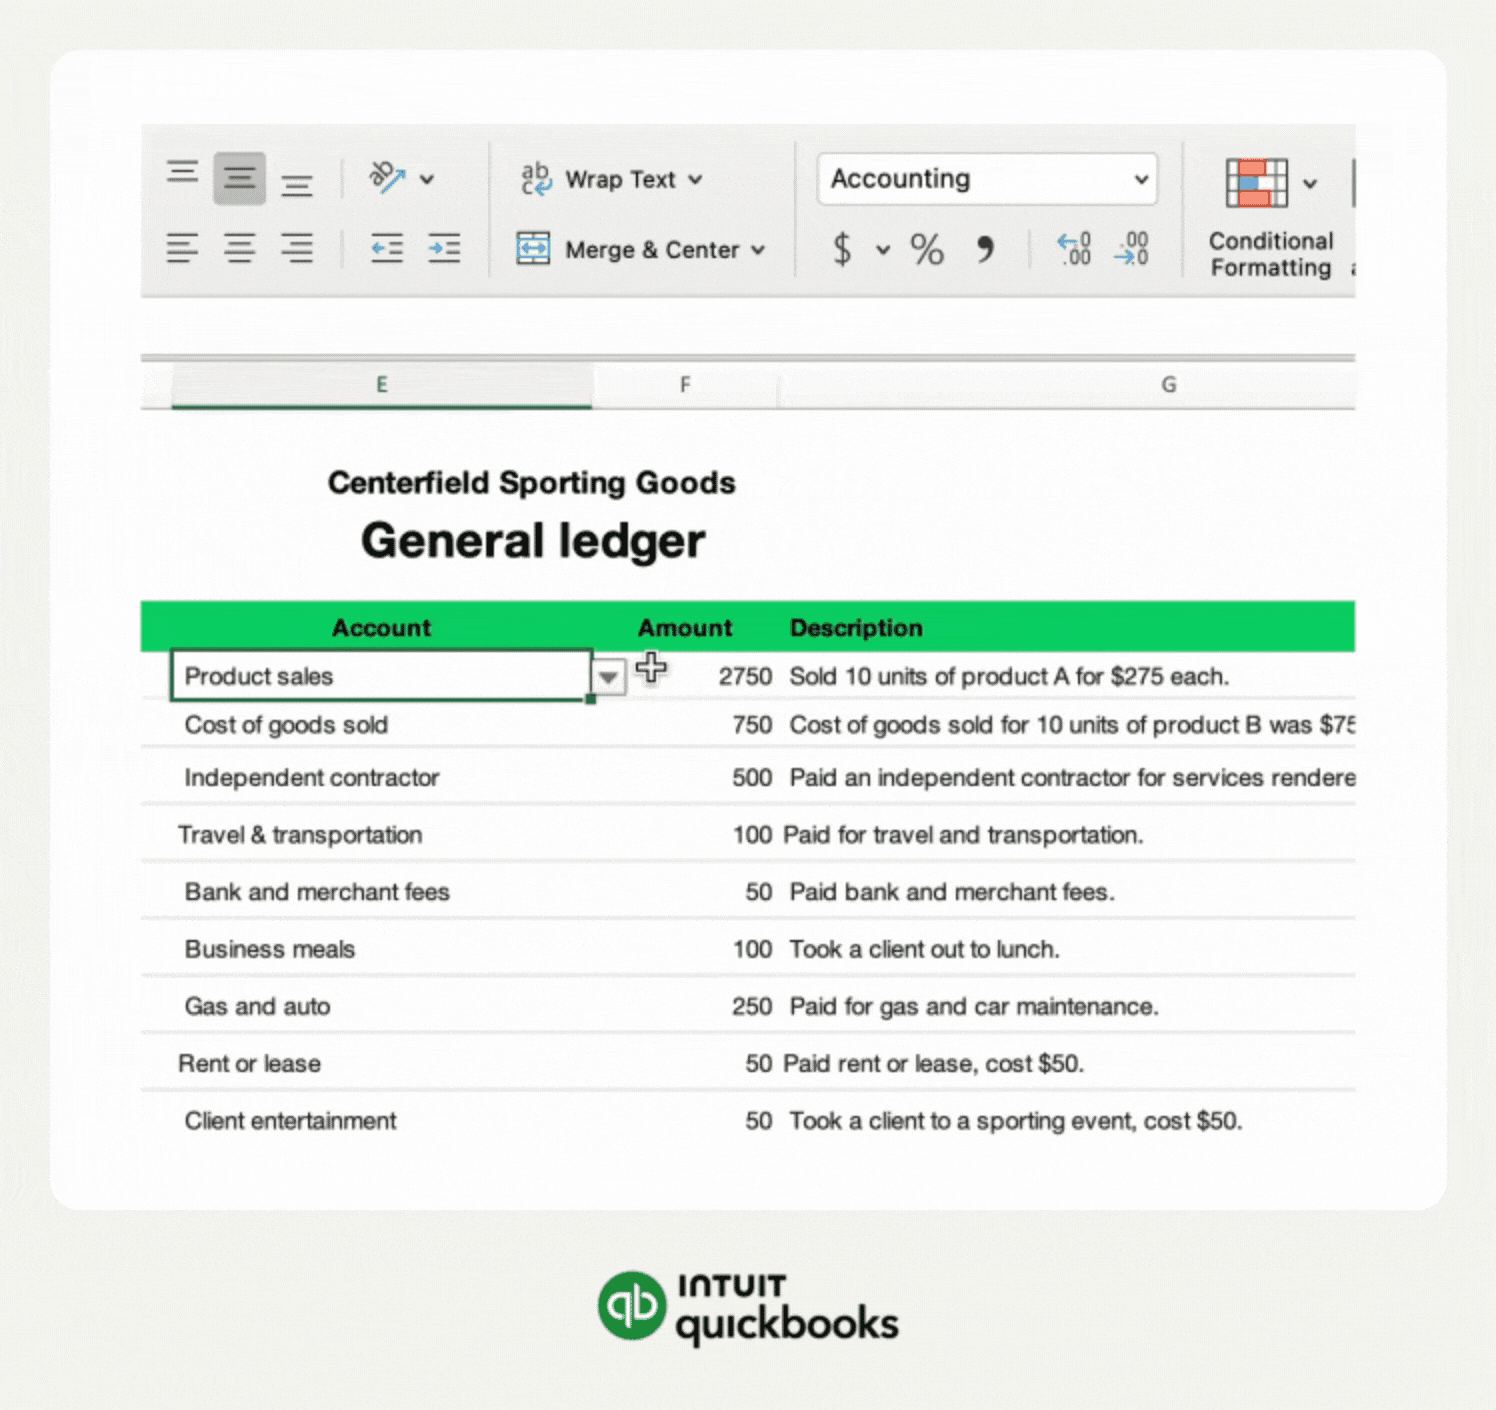
Integrating Transaction Recording
Integrating transaction recording is key to building accounting software in Excel. It helps track financial activities clearly and accurately. Recording transactions properly ensures your data stays organized and easy to review. This section explains how to design journal entries and link them to ledger sheets.
Designing Journal Entries
Create a simple table for journal entries in Excel. Include columns for date, description, debit, credit, and account name. Use drop-down lists for account names to avoid errors. Each row should represent one transaction entry. Keep the format clean to make data entry quick and easy.
Ensure debits and credits balance for each transaction. Use data validation to prevent mistakes. This step helps maintain accurate financial records. Clear journal entries form the base of your accounting system.
Linking To Ledger Sheets
Link journal entries to ledger sheets automatically using Excel formulas. Use SUMIFS to pull amounts by account name. This method updates ledgers when new transactions are added. It reduces manual work and improves accuracy.
Organize ledger sheets by account types like assets, liabilities, and expenses. Each ledger should display all related transactions and balances. This setup helps track financial health easily. Linking sheets creates a dynamic and efficient accounting model.
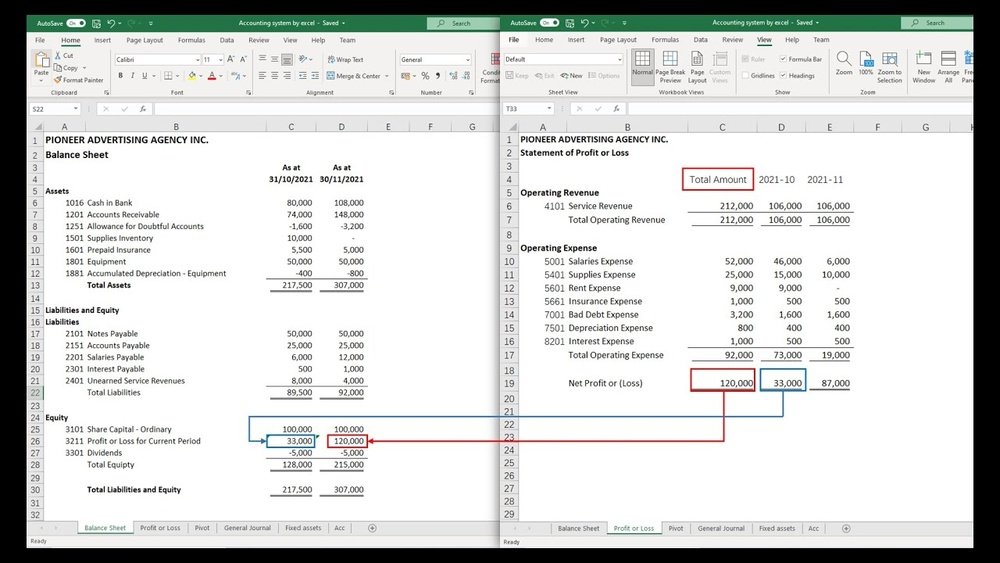
Generating Financial Reports
Generating financial reports is a key part of using accounting software in Excel. These reports show the business’s financial health clearly. They help owners and managers make smart decisions.
Excel lets you create detailed reports from your data. You can build profit and loss statements and balance sheets. These reports update automatically as you enter new data. This saves time and reduces mistakes.
Creating Profit And Loss Statements
Profit and loss statements summarize income and expenses over time. They show if the business made money or lost it. Start by listing all revenue sources in one column. Then, list all expenses in another column. Use Excel formulas to calculate totals and net profit.
Use the SUM function to add up revenues and expenses. Subtract total expenses from total revenues to find net profit. Format the sheet with clear labels and borders. This makes the statement easy to read.
Building Balance Sheets
Balance sheets show assets, liabilities, and equity at a specific date. They provide a snapshot of the company’s financial position. Create separate sections for assets and liabilities. List each item and its value in Excel rows.
Use formulas to total assets and liabilities. Calculate equity by subtracting liabilities from assets. Make sure the sheet balances: assets must equal liabilities plus equity. Format with headings and lines to organize the data neatly.
Adding Security Features
Adding security features to your Excel accounting software protects your data. It helps stop unauthorized users from changing important information. Simple security steps can keep your work safe and reliable.
Protecting Worksheets
Protecting worksheets stops others from editing or deleting your data. You can lock cells that contain formulas or important numbers. This keeps your calculations accurate and prevents accidental changes.
To protect a sheet, go to the Review tab and select “Protect Sheet.” You can choose what users are allowed to do, like selecting cells but not editing them. This control helps keep your data intact.
Setting Passwords
Setting passwords adds an extra layer of security to your Excel file. Only people with the password can open or edit the workbook. This is crucial for keeping sensitive financial information private.
To add a password, click File, then Save As, and choose Tools. Select “General Options” and enter a password to open or modify the file. Remember to save your password in a safe place.
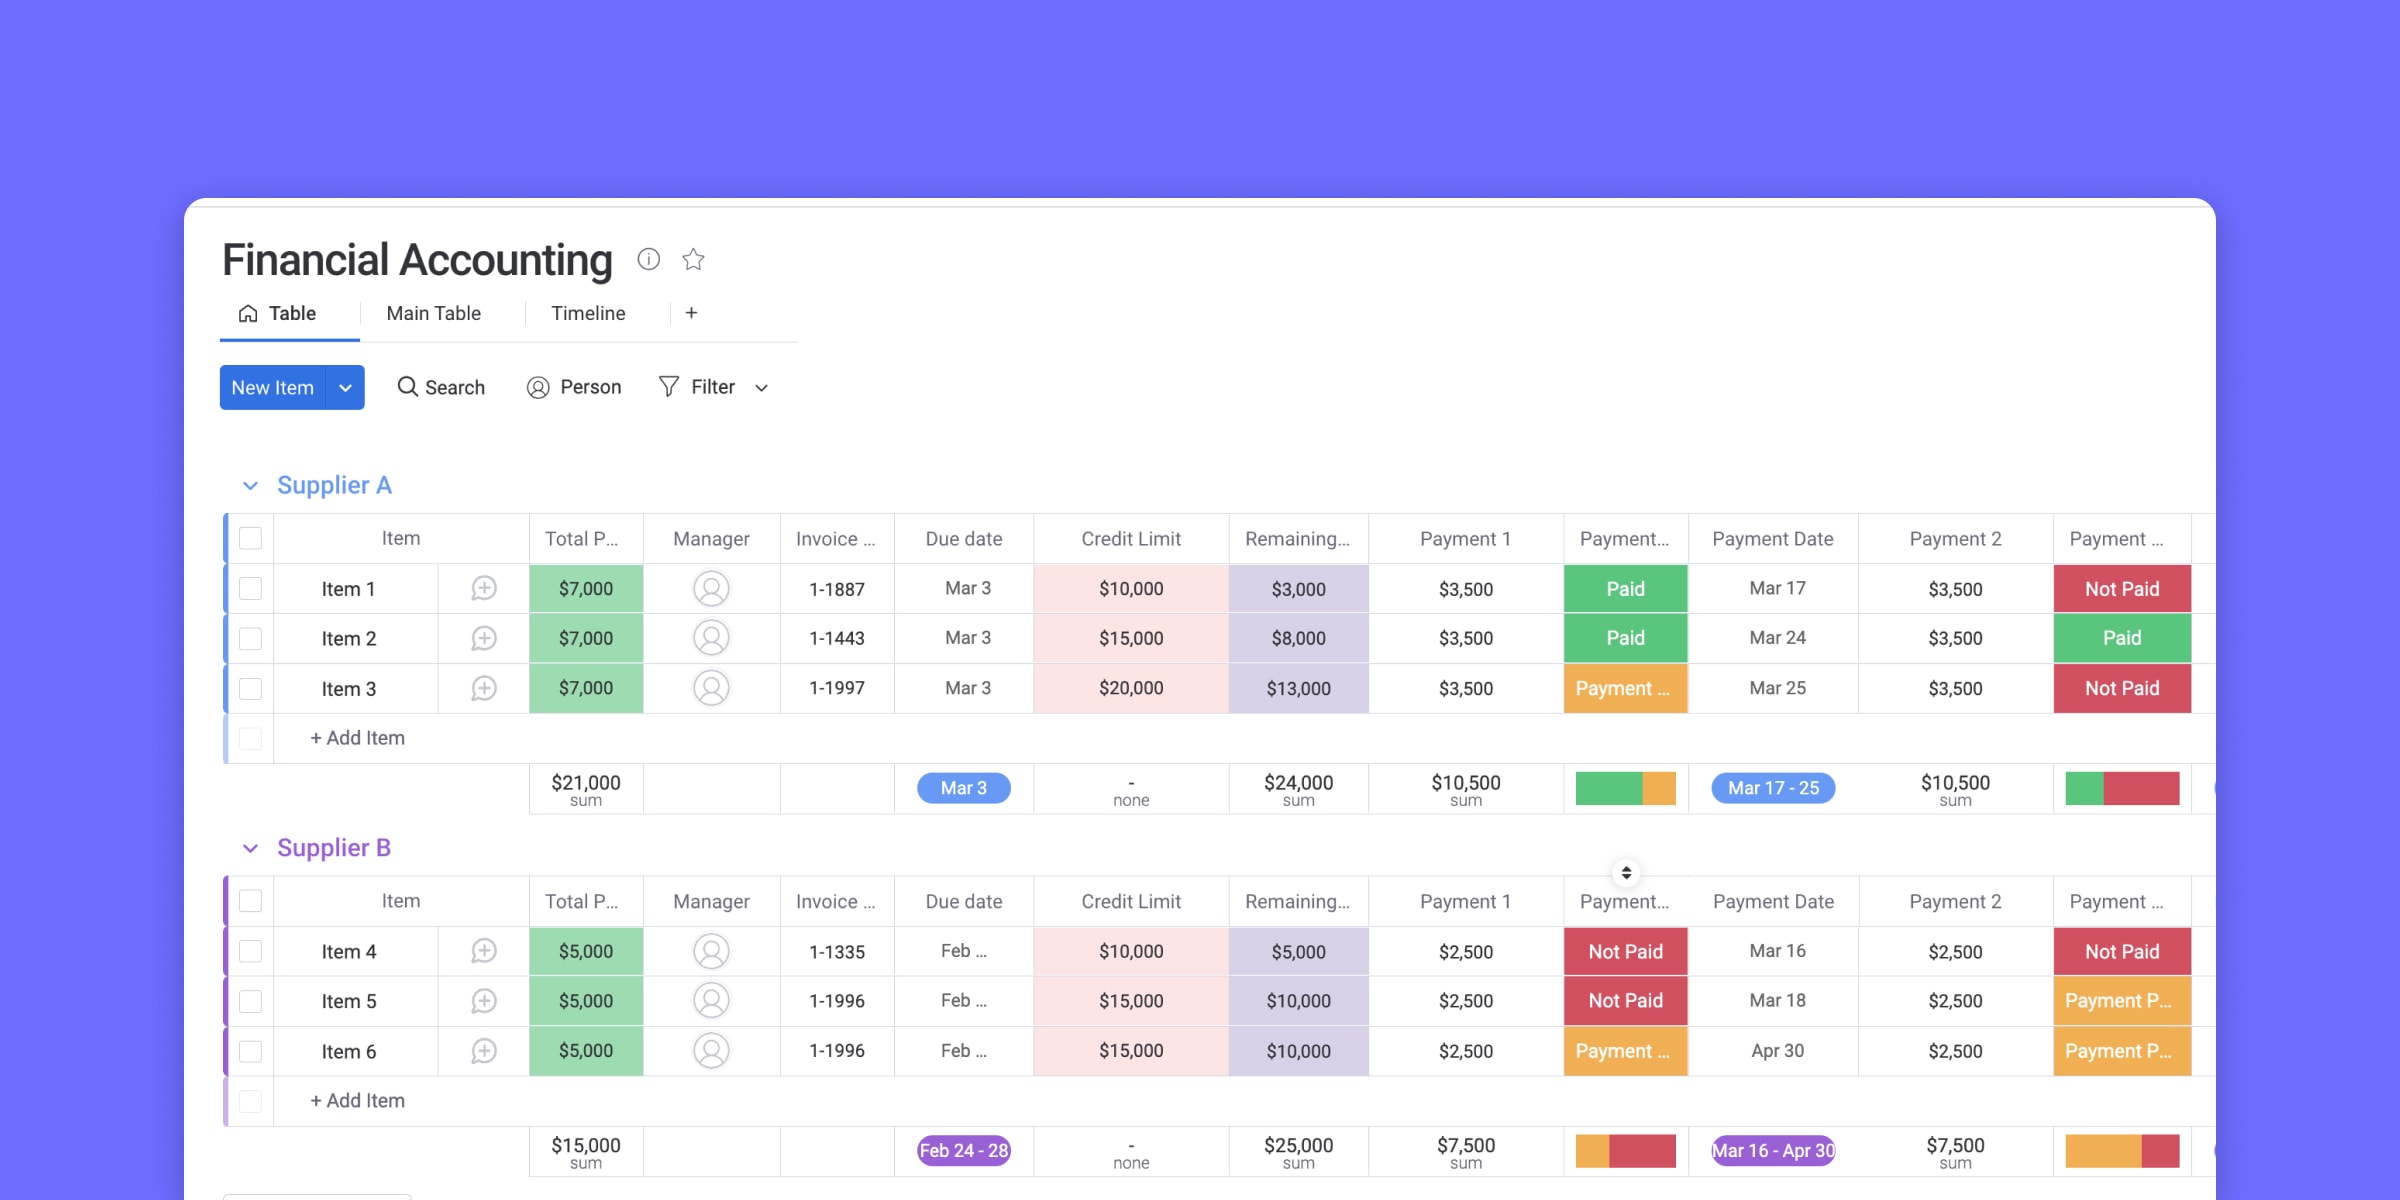
Testing And Troubleshooting
Testing and troubleshooting are vital steps when creating accounting software in Excel. These steps help catch mistakes early and ensure the software works correctly. Without proper testing, errors can lead to wrong financial data and confusion.
Careful checking helps maintain accuracy and trust in your software. Troubleshooting fixes common problems that users may face. Both processes improve the final product and make it easier to use.
Checking Formula Accuracy
Start by reviewing all formulas in your Excel workbook. Check if each formula uses the correct cells and ranges. Ensure calculations match expected results with sample data. Use Excel’s formula auditing tools to trace errors and understand calculations. Test simple cases first, then try complex data sets. Confirm totals, averages, and other calculations are correct. Double-check links between sheets to avoid broken references. Accurate formulas prevent wrong outputs and keep data reliable.
Debugging Common Errors
Look for common Excel errors like DIV/0!, REF!, and VALUE!. These errors show where formulas fail or reference wrong cells. Fix DIV/0! by adding checks for zero in divisors. Replace REF! by correcting broken cell references or deleted cells. For VALUE!, ensure data types match formula requirements. Use Excel’s error checking feature to find hidden issues. Clear unnecessary spaces or text in number fields that cause errors. Test each fix to confirm the error disappears. Regular debugging keeps your software stable and user-friendly.
Credit: monday.com
Tips For Enhancing Your Software
Enhancing your accounting software in Excel makes it easier and faster to use. Small improvements can save time and reduce errors. Focus on automation and a clear design to improve your workflow.
Using Macros For Automation
Macros help automate repetitive tasks in Excel. Record sequences of actions and play them back with a click. This reduces manual work and speeds up processes like data entry and report generation.
You can create macros using the built-in Visual Basic for Applications (VBA) editor. Simple scripts can handle calculations, formatting, and data updates automatically. This helps avoid mistakes and keeps your records consistent.
Improving User Interface
A clean and simple interface makes your software easier to use. Use clear labels for buttons and fields. Organize data in tables with headers and borders to improve readability.
Use colors sparingly to highlight important areas, like totals or alerts. Avoid clutter by hiding unused rows or columns. Add drop-down lists for standard inputs to reduce typing errors and speed up data entry.
Frequently Asked Questions
How Can I Start Creating Accounting Software In Excel?
Begin by outlining your accounting needs clearly. Use Excel’s templates or create custom sheets for transactions, ledgers, and reports. Organize data with tables and formulas for automation.
What Excel Features Are Essential For Accounting Software?
Key features include formulas, pivot tables, data validation, and charts. These tools help automate calculations, organize data, and visualize financial information effectively.
How Do I Ensure Accuracy In Excel Accounting Software?
Use data validation to prevent errors and double-check formulas regularly. Protect sheets to avoid accidental changes and reconcile entries often for accuracy.
Can I Customize Excel For Specific Accounting Needs?
Yes, Excel is highly customizable. You can add macros, create unique formulas, and design templates that fit your specific accounting processes and business requirements.
Conclusion
Creating accounting software in Excel is simple and useful. You can track expenses and income with ease. Use basic formulas and organize your data well. This helps you stay on top of your finances. Practice makes your software better each time.
Keep updating it as your needs change. Excel offers flexibility without extra cost. Start small, then add more features step by step. You will save time and avoid errors in your accounts. Try building your own Excel accounting tool today.
