
Are you tired of juggling numbers and losing track of your finances? What if you could build your own accounting software right in Excel—without needing any advanced coding skills?
Creating custom accounting tools tailored to your needs can save you time, reduce errors, and give you full control over your financial data. You’ll discover simple, step-by-step instructions to turn Excel into a powerful accounting solution. Get ready to transform how you manage your accounts and make your financial tasks easier than ever.
Keep reading to unlock the secrets of building your own accounting software today!

Credit: www.youtube.com
Planning Your Accounting Software
Planning your accounting software in Excel is the first step. Good planning saves time and avoids mistakes. It helps you create a tool that fits your needs perfectly.
Start by thinking about what your software must do. Then, pick the right Excel version. Finally, design a simple workflow to keep everything clear and easy.
Identifying Key Features
List the main tasks your software should handle. Common features include tracking income and expenses, managing invoices, and generating reports. Decide which features are most important for your business. Avoid adding too many features at once. Focus on what you really need.
Choosing The Right Excel Version
Select an Excel version that fits your computer and needs. Newer versions have more tools and better security. Older versions may not support some functions. Check if your version supports macros and formulas you want to use. This choice affects how well your software runs.
Designing The Workflow
Create a simple step-by-step process for using your software. Start with data entry, then processing, and finally, reporting. Make sure each step flows smoothly to the next. Use separate sheets for different tasks to stay organized. A clear workflow makes your software easier to use and maintain.
Setting Up The Workbook
Setting up the workbook is the first step in creating accounting software in Excel. This step organizes your data and makes your work easier. A well-structured workbook helps you track finances clearly and avoid mistakes. It also saves time during data entry and analysis.
You need to prepare your workbook carefully. Creating separate sheets for different tasks keeps data clean. Formatting cells properly ensures accurate input. Naming conventions help identify sheets and data quickly.
Creating Worksheets For Data Entry
Create separate worksheets for each type of data. For example, make sheets for income, expenses, and assets. This separation keeps your workbook tidy and easy to use. Label each sheet with clear names. Use simple titles like “Income” or “Expenses” for quick reference.
Formatting Cells For Data Types
Format cells based on the data they will hold. Use currency format for money amounts. Date format is needed for transaction dates. Text format works for descriptions or names. Proper formatting prevents errors and helps Excel calculate correctly.
Establishing Naming Conventions
Use consistent names for sheets, ranges, and tables. Start names with a letter and avoid spaces. Use underscores or camel case to separate words. For example, use “Sales_Data” or “ExpenseReport”. Consistent names make formulas easier to write and understand.
Building The Data Entry Forms
Building data entry forms is a key step in creating accounting software in Excel. These forms make it easy to input and organize financial data. Well-designed forms reduce errors and save time. They also help keep your records clear and consistent.
This section shows how to build effective data entry forms using Excel features. You will learn to use tables, data validation, and drop-down lists. These tools improve your form’s accuracy and usability.
Using Tables For Transactions
Tables organize your transaction data neatly. They allow easy sorting and filtering. You can add new rows quickly without breaking formulas. Tables also make it simple to reference data in other parts of your workbook. Excel updates formulas automatically when you add or remove rows.
Create a table by selecting your data and pressing Ctrl + T. Name your table for easy identification. Use tables to track dates, amounts, descriptions, and categories. This setup keeps your accounting data structured and ready for analysis.
Implementing Data Validation
Data validation helps prevent entry errors. It restricts the type of data users can enter. For example, you can limit entries to numbers only, dates, or text within a certain length.
To apply data validation, select the cells where data will be entered. Go to the Data tab, click Data Validation, and set your rules. This step ensures your financial data stays accurate and consistent throughout the workbook.
Adding Drop-down Lists
Drop-down lists simplify data entry and reduce mistakes. They let users choose values from a predefined list instead of typing. This feature is useful for categories, payment methods, or account names.
Create a list on a separate sheet or a hidden area in your workbook. Select the data entry cells, go to Data Validation, and choose List. Then, link the drop-down to your list range. Drop-down lists make your form user-friendly and fast to fill out.
Developing Core Calculations
Developing core calculations is essential for creating effective accounting software in Excel. These calculations handle your income, expenses, and balances. They make your spreadsheet functional and easy to use. Proper formulas help track financial data accurately. This section guides you through building these key elements.
Formulating Income And Expenses
Start by listing all income sources in one column. Use simple addition formulas to total income. Next, create a separate column for expenses. Add expenses using SUM functions for accuracy. Label each row clearly to avoid confusion. Keep formulas easy to understand for quick updates.
Calculating Balances Automatically
Calculate balances by subtracting expenses from income. Use the formula =SUM(income_range) - SUM(expense_range). Place this formula in a balance cell for real-time updates. This method reduces errors and saves time. It shows your current financial position instantly.
Using Conditional Formatting
Apply conditional formatting to highlight important data. For example, color negative balances red to alert users. Use green for positive balances to show profits. Highlight overdue payments or large expenses with bold colors. This visual aid improves data readability and decision-making.
Generating Financial Reports
Generating financial reports is a key step in accounting software. These reports show the financial health of a business. Using Excel, you can create clear and useful reports. These help business owners make smart decisions. You will learn to build three important reports here.
Creating Profit And Loss Statements
A profit and loss statement shows income and expenses. It tells if the business made money or lost it. Start by listing all income sources in one column. Next, add all expenses in another column. Use Excel formulas to subtract expenses from income. This gives the net profit or loss. Update this sheet regularly to track performance.
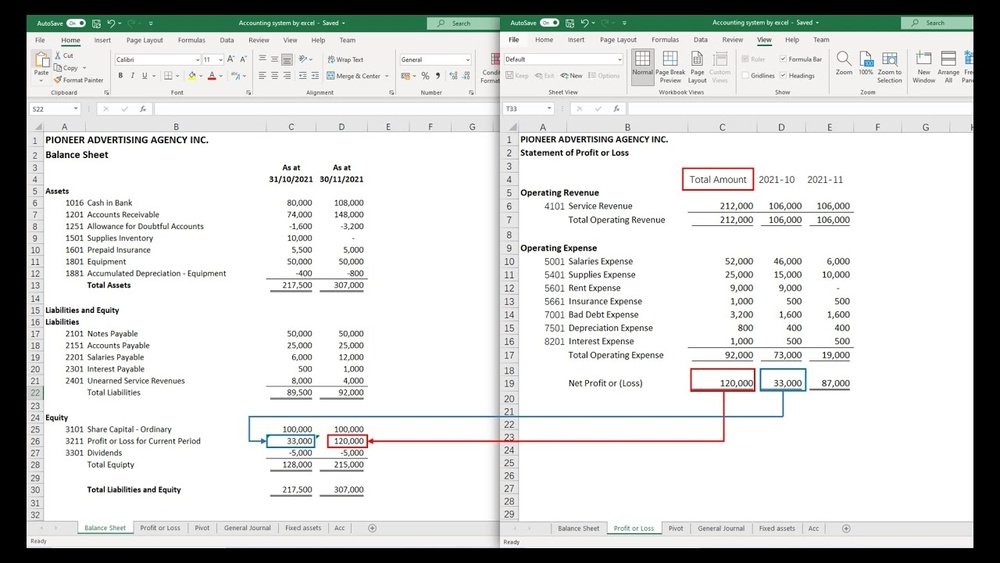
Building Balance Sheets
The balance sheet shows what a business owns and owes. It has three parts: assets, liabilities, and equity. List all assets such as cash, equipment, and inventory. Then, list liabilities like loans and bills to pay. Equity is what remains after subtracting liabilities from assets. Excel tables and formulas help keep these numbers accurate. A balanced sheet means assets equal liabilities plus equity.
Designing Cash Flow Summaries
Cash flow summaries track money coming in and going out. This report helps see if the business has enough cash daily. List all cash receipts and payments by date. Use Excel to sum cash inflows and outflows each month. This shows net cash flow and highlights cash shortages. Keeping this report updated prevents surprises in cash management.

Credit: quickbooks.intuit.com
Automating Tasks With Macros
Automating tasks with macros can save time and reduce errors in your Excel accounting software. Macros let you repeat tasks quickly. You can create simple commands that perform multiple steps with one click.
This makes your accounting process faster and easier. It also helps keep your data consistent. Even beginners can use macros to improve their Excel skills and make the software more useful.
Recording Basic Macros
Start by recording a basic macro to automate simple tasks. Go to the Developer tab and click “Record Macro.” Give your macro a name and assign a shortcut key if you want.
Perform the actions you want to automate, like formatting cells or entering formulas. Click “Stop Recording” when done. You can run the macro anytime to repeat those steps automatically.
Assigning Macros To Buttons
Buttons make running macros easier, especially for users who do not know shortcuts. Insert a button from the Developer tab by selecting “Insert” and then “Button.”
Draw the button on your worksheet and link it to the macro you recorded. Now, clicking the button runs the macro instantly. This method improves user experience and speeds up work.
Ensuring Security Settings
Macros can contain harmful code, so Excel limits their use by default. Adjust your security settings to enable trusted macros only. Go to File > Options > Trust Center > Trust Center Settings.
Choose “Disable all macros with notification” to get alerts before running a macro. Always save your work before running macros. Only enable macros from sources you trust to keep your data safe.
Testing And Troubleshooting
Testing and troubleshooting are key steps in building accounting software in Excel. These steps help find errors and fix them early. Without testing, mistakes can cause wrong financial reports. Troubleshooting improves software reliability. This section shows how to check formulas, fix errors, and boost performance.
Checking Formula Accuracy
Start by reviewing all formulas carefully. Make sure each formula uses the right cells. Test formulas with sample data to see if results match expectations. Use Excel’s formula auditing tools like Trace Precedents and Trace Dependents. These tools show how cells connect. Double-check calculations involving sums, averages, and percentages. Small errors in formulas can lead to big mistakes.
Debugging Common Errors
Look for common Excel errors such as DIV/0!, VALUE!, and REF!. These errors often happen due to wrong cell references or empty cells. Use the IFERROR function to manage errors gracefully. Check for circular references, which cause endless loops. Use Excel’s Error Checking tool to find issues quickly. Fix errors by correcting formulas or adjusting cell references. Keep formulas simple to reduce errors.
Optimizing Performance
Large Excel files can slow down your software. Limit the use of volatile functions like NOW() or INDIRECT(). These functions recalculate often and reduce speed. Use Excel tables to organize data efficiently. Avoid unnecessary formatting and keep only needed data in your workbook. Break complex formulas into smaller steps to improve clarity and speed. Regularly save your work to prevent data loss.
Credit: pakaccountants.com
Maintaining And Updating Software
Maintaining and updating your accounting software in Excel is essential for its smooth operation. Regular care keeps the software reliable and efficient. It also helps prevent data loss and improves user satisfaction. Small updates can make a big difference over time. Staying organized and proactive saves time and effort later.
Backing Up Data Regularly
Backing up data is a must. Save copies of your Excel file often. Use external drives or cloud storage. This protects your data from accidental loss. Set a schedule to back up daily or weekly. Check backups to ensure they work correctly.
Incorporating User Feedback
Listen to users of your software. They can spot issues or suggest improvements. Collect feedback through simple forms or emails. Prioritize changes that fix bugs or add value. Updating the software based on feedback keeps users happy.
Expanding Features Over Time
Start with basic functions and add more later. Add features that help users work faster. Keep new features simple and easy to use. Test each update carefully before sharing it. Gradual improvements keep the software useful and relevant.
Frequently Asked Questions
What Are The Basics Of Accounting Software In Excel?
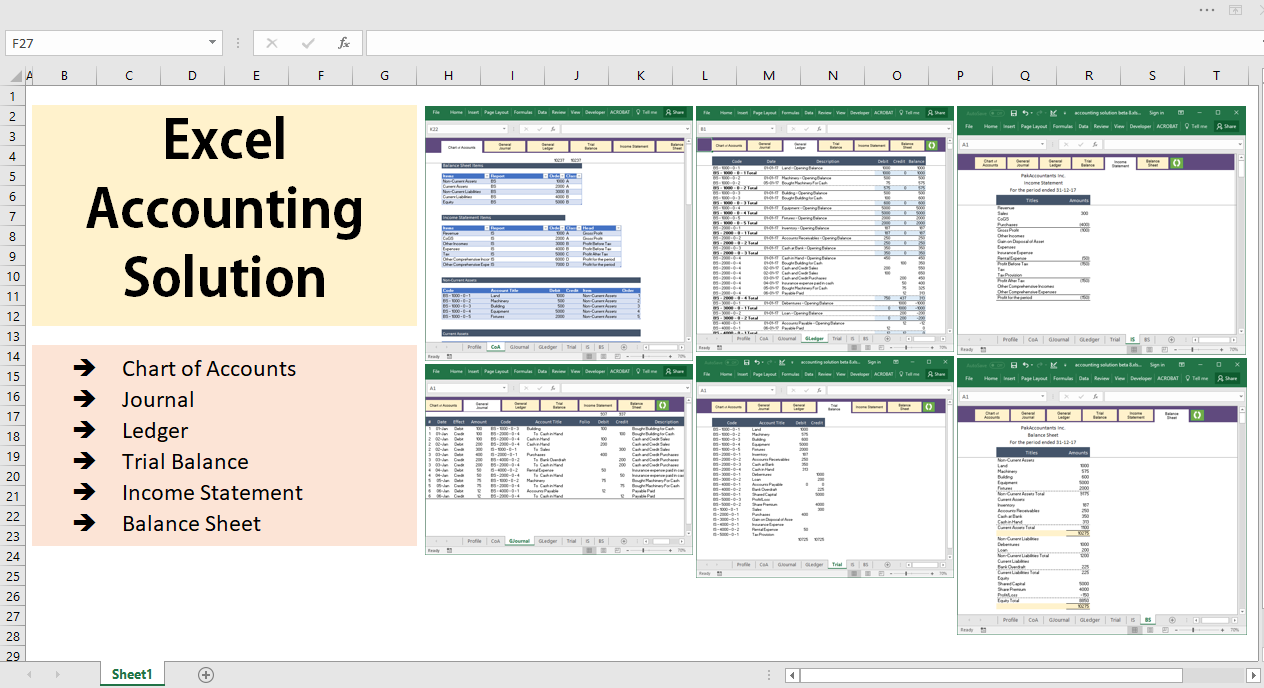
Accounting software in Excel tracks income, expenses, and financial transactions. It uses spreadsheets, formulas, and templates for easy data management. This method suits small businesses needing cost-effective, customizable accounting solutions without complex software.
How Do I Start Creating Accounting Software In Excel?
Begin by designing spreadsheets for income, expenses, and balance sheets. Use Excel formulas for calculations and data validation for accuracy. Organize data logically for easy updates and reporting. Start simple and expand features as needed.
Can Excel Handle Complex Accounting Tasks?
Excel can manage basic to moderate accounting tasks effectively. It supports formulas, pivot tables, and macros for automation. However, very complex accounting may require specialized software for enhanced security and compliance.
What Excel Features Help Automate Accounting Processes?
Key features include formulas, pivot tables, macros, and data validation. These tools automate calculations, generate reports, and minimize errors. Using templates and conditional formatting also improves efficiency and data visualization.
Conclusion
Creating accounting software in Excel is simpler than you think. Start with clear goals and basic Excel skills. Use formulas to automate calculations and organize data neatly. Test your sheet to find and fix errors early. Keep improving your software step by step.
This approach saves money and fits your needs perfectly. Excel offers flexibility without complex coding. With patience, anyone can build useful accounting tools. Try it yourself and see how easy managing finances can become.
